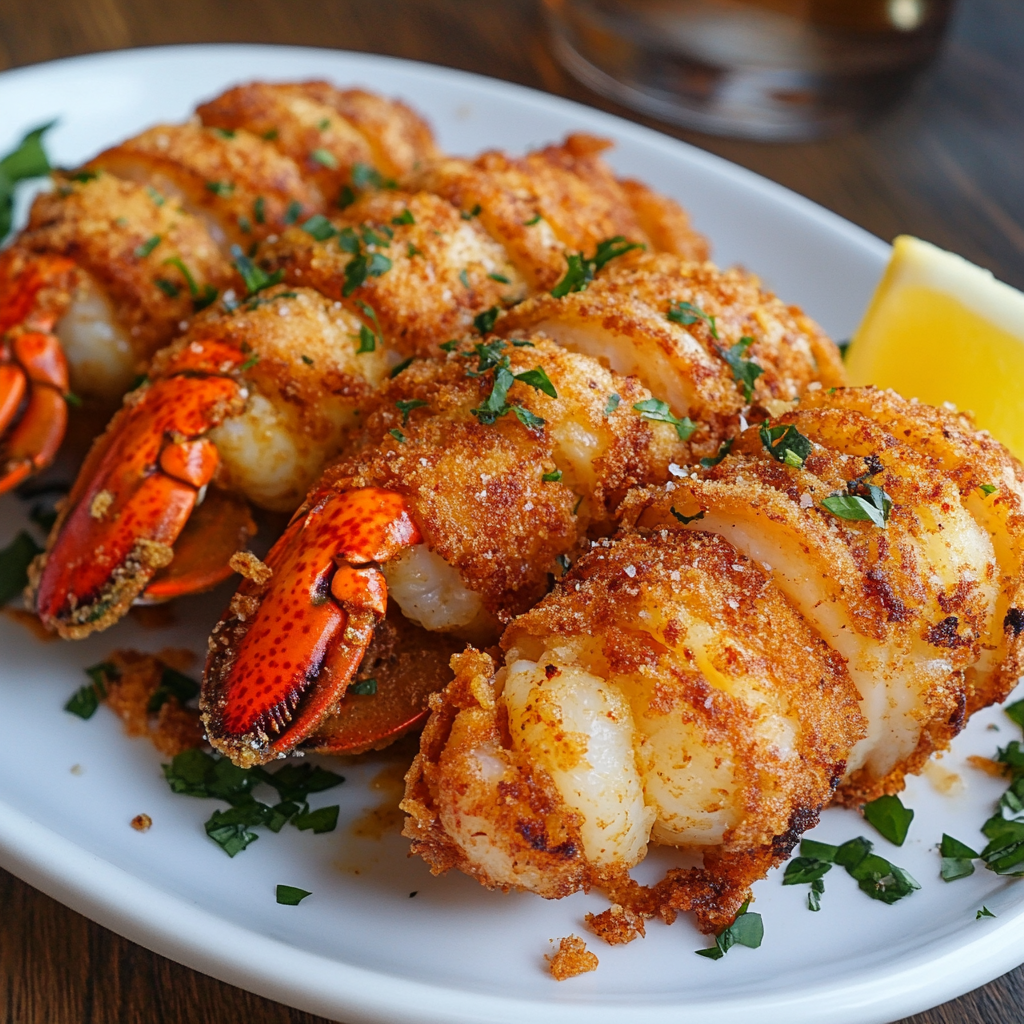
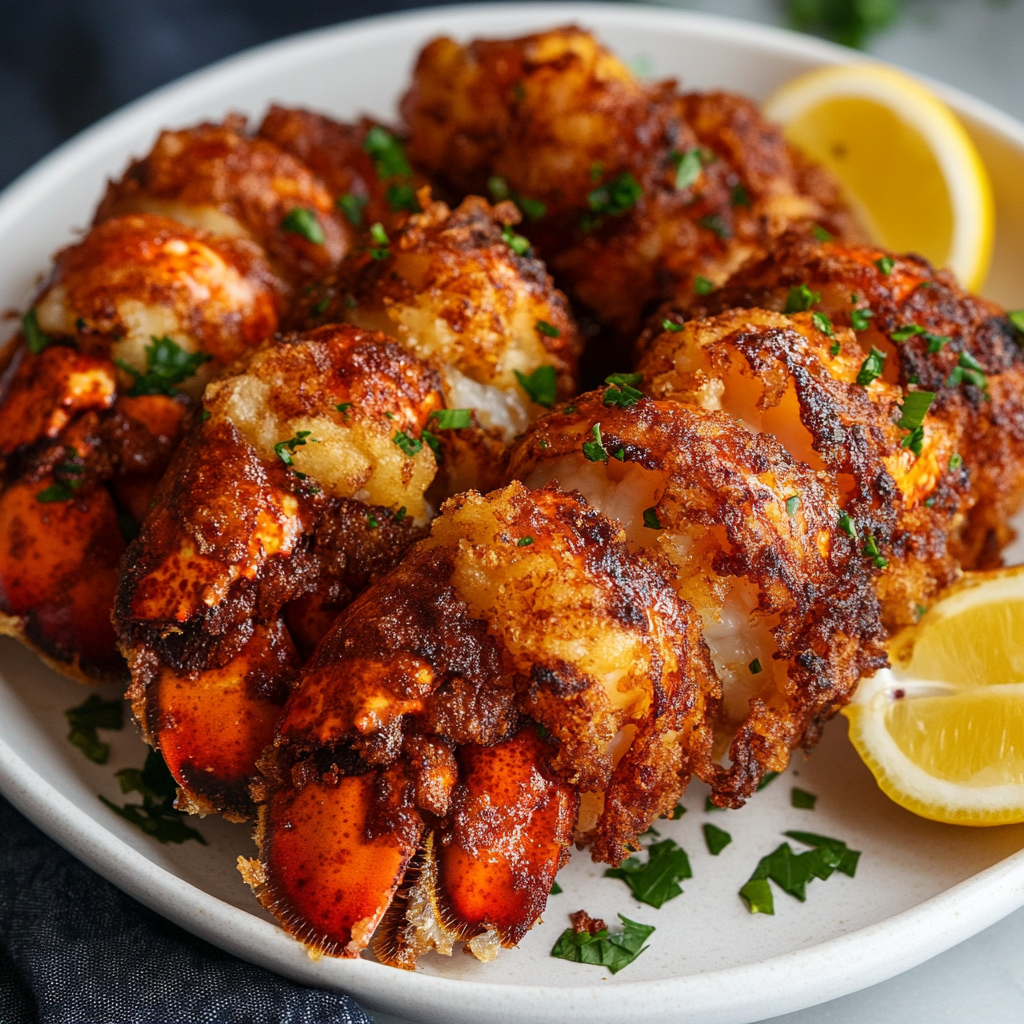
Crispy Fried Lobster Tails
Crispy Fried Lobster Tails are an indulgent delight that can elevate any meal. Whether for a special occasion or a cozy dinner at home, these lobster tails are crispy on the outside and succulent inside. This dish stands out due to its rich flavor and the satisfying crunch that comes from frying. Perfectly seasoned and easy to prepare, Crispy Fried Lobster Tails will impress your guests and satisfy your cravings.
Why You’ll Love This Recipe
- Easy to Prepare: With just a few simple steps, you can whip up this gourmet dish in no time.
- Delicious Flavor: The combination of buttermilk and Old Bay seasoning creates a bold taste that’s hard to resist.
- Crowd-Pleaser: Serve these succulent tails at gatherings, and watch them disappear quickly!
- Versatile Serving Options: Enjoy them as an appetizer or a main dish paired with your favorite sides.
- Perfect for Special Occasions: Impress family and friends with this luxurious yet simple seafood dish.
Tools and Preparation
To make Crispy Fried Lobster Tails, you’ll need some essential tools that will help you achieve the best results. Gathering these items beforehand will streamline the cooking process.
Essential Tools and Equipment
- Deep fryer or heavy-bottomed pot
- Cooking thermometer
- Tongs
- Mixing bowls
Importance of Each Tool
- Deep fryer or heavy-bottomed pot: Ensures even heat distribution for perfectly cooked lobster tails.
- Cooking thermometer: Helps you monitor oil temperature, ensuring crispy results without overcooking.
- Tongs: Allow for safe handling of hot lobster tails during frying.
- Mixing bowls: Essential for marinating the lobster tails in buttermilk and mixing the flour coating.
Ingredients
For the Lobster Tails
- 3 lobster tails
For the Breading Mixture
- 1 cup buttermilk
- 1 tsp Old Bay seasoning
For the Coating
- 1 cup all-purpose flour
How to Make Crispy Fried Lobster Tails
Step 1: Prepare the Lobster Tails
Start by thawing your lobster tails if they are frozen. Using kitchen scissors, carefully cut through the shell of each tail down the middle, avoiding cutting into the meat. Gently pull apart the shell to expose the meat slightly.
Step 2: Marinate in Buttermilk
In a mixing bowl, pour in the buttermilk. Add the lobster tails, ensuring they are fully submerged. Cover and let them marinate in the refrigerator for at least 30 minutes. This step helps tenderize and flavor the meat.
Step 3: Season Flour Mixture
In another bowl, combine the all-purpose flour with Old Bay seasoning. Mix well until evenly combined. This seasoned flour will give your lobster tails that extra kick!
Step 4: Heat Oil
In your deep fryer or heavy-bottomed pot, fill it with oil (about 3 inches deep) and heat it to 350°F (175°C). Use your cooking thermometer to check the temperature regularly.
Step 5: Coat Lobster Tails
Once marinated, remove each lobster tail from the buttermilk, allowing excess liquid to drip off. Dredge each tail in the seasoned flour mixture until fully coated.
Step 6: Fry Until Golden Brown
Carefully place coated lobster tails into hot oil one at a time. Fry for about 3-4 minutes or until they turn golden brown and crispy. Use tongs to turn them occasionally for even cooking.
Step 7: Drain Excess Oil
Once cooked, transfer lobster tails onto a plate lined with paper towels to drain excess oil. Allow them to cool slightly before serving.
Enjoy your delicious Crispy Fried Lobster Tails!
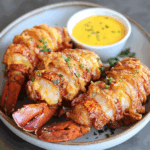
How to Serve Crispy Fried Lobster Tails
Crispy Fried Lobster Tails make for an exquisite dish that can elevate any meal. Here are some delightful serving suggestions to enhance your dining experience.
Pair with Dipping Sauces
- Garlic Butter: A rich and savory sauce that complements the sweetness of the lobster.
- Spicy Aioli: Add a kick to your meal with this creamy and zesty dip.
- Lemon Herb Sauce: A refreshing option that brightens the flavors of the lobster.
Create a Seafood Platter
- Mixed Seafood: Serve your crispy fried lobster tails alongside shrimp and calamari for a delightful variety.
- Crusty Bread: Include slices of freshly baked bread to soak up any leftover sauces.
Serve with Fresh Salads
- Caesar Salad: The crisp greens and creamy dressing balance the richness of the lobster tails.
- Coleslaw: A tangy slaw adds crunch and contrast to your dish.
How to Perfect Crispy Fried Lobster Tails
Achieving perfectly crispy fried lobster tails is easy with these helpful tips.
- Use Buttermilk Marinade: This tenderizes the meat and adds flavor, ensuring a juicy bite.
- Coat Generously in Flour: A thick layer of flour creates a crunchy exterior that enhances texture.
- Maintain Oil Temperature: Fry at 350°F (175°C) for optimal crispiness. Too cold oil leads to soggy tails.
- Don’t Overcrowd the Pan: Fry in batches; overcrowding lowers the oil temperature, impacting crispiness.
Best Side Dishes for Crispy Fried Lobster Tails
Crispy Fried Lobster Tails can be complemented perfectly with various side dishes. Here are some fantastic options:
- Garlic Mashed Potatoes: Creamy and flavorful, they provide a comforting base for your meal.
- Steamed Asparagus: Bright green asparagus adds color and a healthy crunch to your plate.
- Corn on the Cob: Sweet, buttery corn pairs beautifully with seafood for a classic combination.
- Roasted Vegetables: Seasonal veggies roasted to perfection add depth and nutrition.
- Rice Pilaf: Fluffy rice mixed with herbs makes a light yet satisfying side dish.
- Potato Wedges: Crispy potato wedges are an indulgent companion that everyone loves.
Common Mistakes to Avoid
To ensure your Crispy Fried Lobster Tails turn out perfectly, it’s essential to avoid some common pitfalls.
- Bold seasoning choice: Using too little or too much seasoning can ruin the flavor. Stick to the recommended Old Bay seasoning for a balanced taste.
- Bold frying temperature: Frying at the wrong temperature can lead to soggy or burnt tails. Use a thermometer to maintain oil around 350°F (175°C).
- Bold batter consistency: If your batter is too thick or too thin, it won’t adhere well. Aim for a smooth, pourable consistency that clings to the lobster tails.
- Bold overcrowding the fryer: Adding too many tails at once can lower the oil temperature. Fry in batches for even cooking and crispiness.
- Bold skipping the buttermilk soak: Not soaking your lobster tails in buttermilk can lead to less tender meat. Soak for at least 30 minutes for optimal flavor and texture.
- Bold not draining properly: Failing to drain excess oil can make your lobster tails greasy. Let them rest on paper towels after frying.
Storage & Reheating Instructions
Refrigerator Storage
- Store your Crispy Fried Lobster Tails in an airtight container.
- They will last up to 2 days in the refrigerator.
- Make sure they are completely cooled before sealing.
Freezing Crispy Fried Lobster Tails
- Place cooled lobster tails in a single layer on a baking sheet.
- Freeze them until solid, then transfer to freezer bags.
- They can be frozen for up to 3 months.
Reheating Crispy Fried Lobster Tails
- Oven: Preheat your oven to 350°F (175°C). Place lobster tails on a baking sheet and heat for about 10-15 minutes until crispy.
- Microwave: Use with caution; place tails on a microwave-safe plate and cover with a damp paper towel. Heat in short intervals until warm.
- Stovetop: Heat some oil in a skillet over medium heat, add lobster tails, and fry briefly until heated through and crispy again.
Frequently Asked Questions
Here are some common questions about making Crispy Fried Lobster Tails.
How do I choose fresh lobster tails?
Fresh lobster tails should be firm, with no discoloration or strong odor. Look for bright shells and clear meat.
Can I use different seasonings?
Absolutely! Feel free to experiment with spices like garlic powder, paprika, or lemon zest for variety in your crispy fried lobster tails.
What dipping sauces pair well?
Lemon butter, tartar sauce, or spicy aioli complement crispy fried lobster tails beautifully.
Can I make these ahead of time?
While best served fresh, you can prepare them ahead by frying and then reheating before serving.
Final Thoughts
These Crispy Fried Lobster Tails are not only delicious but also offer versatility for any occasion. You can customize flavors and dips to match your preferences. Give this recipe a try; it’s sure to impress!
Crispy Fried Lobster Tails
Indulge in the luxurious yet approachable Crispy Fried Lobster Tails, a dish that effortlessly transforms any meal into a gourmet experience. With their crispy exterior and tender, succulent meat, these lobster tails are perfect for special occasions or cozy dinners at home. Marinated in buttermilk and seasoned with Old Bay, each bite delivers bold flavors and delightful crunch. Serve them as an impressive appetizer or a standout main course alongside your favorite sides. Easy to prepare and sure to impress, Crispy Fried Lobster Tails are a must-try for seafood lovers!
- Prep Time: 30 minutes
- Cook Time: 10 minutes
- Total Time: 40 minutes
- Yield: Serves approximately 2 people 1x
- Category: Main
- Method: Frying
- Cuisine: Seafood
Ingredients
- 3 lobster tails
- 1 cup buttermilk
- 1 tsp Old Bay seasoning
- 1 cup all-purpose flour
Instructions
- Thaw lobster tails if frozen and cut through the shell down the middle.
- Marinate the tails in buttermilk for at least 30 minutes.
- Combine flour and Old Bay seasoning in a bowl.
- Heat oil in a deep fryer or pot to 350°F (175°C).
- Remove lobster tails from buttermilk, coat them in the flour mixture, and fry until golden brown for about 3-4 minutes.
- Drain on paper towels and serve hot.
Nutrition
- Serving Size: 2 lobster tails (180g)
- Calories: 450
- Sugar: 5g
- Sodium: 600mg
- Fat: 25g
- Saturated Fat: 6g
- Unsaturated Fat: 17g
- Trans Fat: 0g
- Carbohydrates: 35g
- Fiber: 2g
- Protein: 22g
- Cholesterol: 150mg